Basket: £0.00
View Basket »
Open to Trade & Public
Professionals to DIY
Professionals to DIY
CUSTOMER SERVICE
We're Online 9am - 5pm
We're Online 9am - 5pm
FREE DELIVERY
On Orders Over £30
On Orders Over £30
Published: 23/10/2020
A Beginner's Guide to Professional Car Care
Good car care is all about getting the most out of your vehicle. Here's our guide to looking after your prized possession using the best detailing methods available.
Do you love your car? If so, you might want to start thinking like a pro and give your baby the proper car care it deserves. Giving your car a quick wash by yourself with a sponge or putting it through a five-quid car wash isn't the quality care your car needs (or wants).
In this post we look at how to care for your car like a pro by breaking down the full car-detailing process. We'll go through everything from scrubbing the wheels to the finishing touches.
Why should you care about your car? A car is a considerable investment, and as soon as it’s on the road, it becomes vulnerable to the sun, salt, grease, grime, rain, acid rain, smog, tree sap, bugs, and — to top it all off — bird droppings.
If you want to keep your car in great shape and fight off that car depreciation as much as possible, quality car care is essential. You will also reduce your risk of expensive issues down the line. Finally, your car will look nice, which is what we want, right?
The Professional Car Care Method
Wash the Wheels

The wheels always go first. Why? Because they are the dirtiest part of the car and the hardest to clean. Plus, if you leave them to last, you will likely dirty your car again in the process.
If you have beautiful alloys, cleaning them regularly will keep them shining and looking great all year round. It also allows you to check out the alloys’ health and deal with any minor scratches you may have picked up.
Step 1 - Use a wheel cleaner
Using a dedicated wheel cleaner is the best method. Most wheel cleaners require a simple spray application. You leave it for the recommended amount of time (1-3 minutes), and then move on to step 2.
Step 2 - Scrub
Select a sash detailing brush and start to work in the wheel cleaner. Work in small circles where possible and clean the full face of the wheel and any areas that you can reach. Any remaining dirt or grease should rinse off with relative ease. Focus on areas that are difficult to get into with a flexible wheel brush, such as behind the spokes and rim screws.
Use the alloy wheel barrel brush to clean the barrels of the wheel also and ensure any remaining dirt and grease is removed before rinsing.
Step 3 - Rinse
Now give all your wheels a good rinse with your hose or pressure washer. Make sure you clear all the suds away and scrub any spots you may have missed on the previous step. Your alloys should now be sparkling.
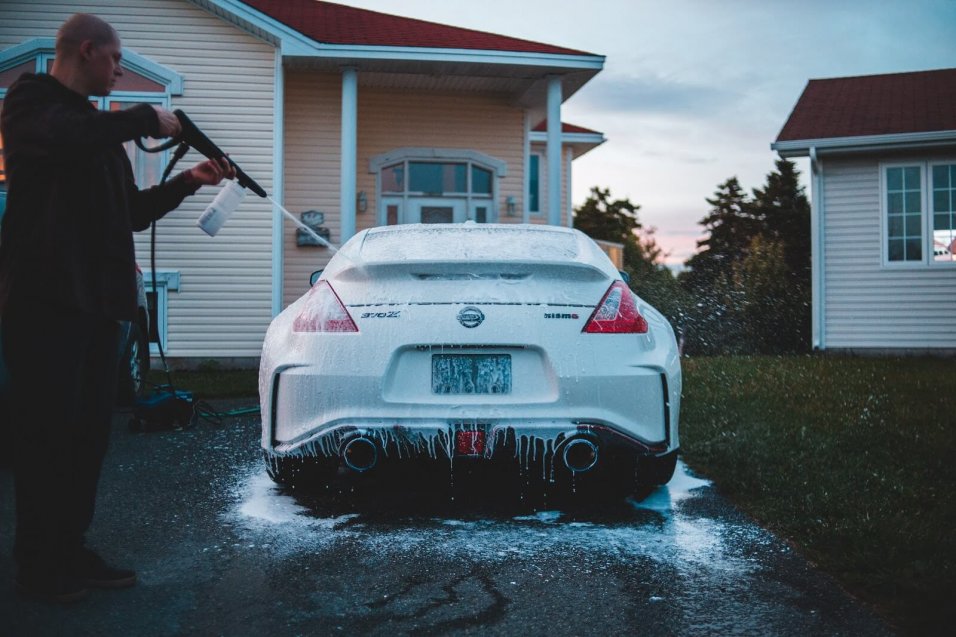
Prewash
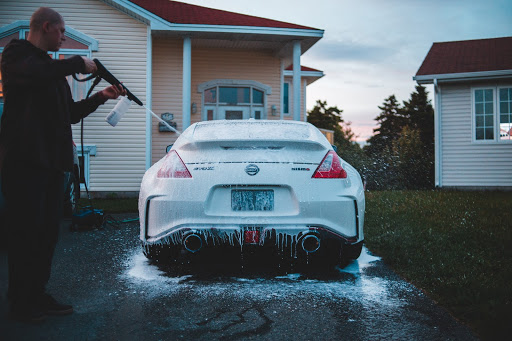
Just like your wheels, your entire car will need a pre-wash to help lift any dirt and grime sitting on the panels. In fact, many would argue that pre-washing your car is more important than shampooing.
You have the choice between snow foam or citrus pre-cleaners. Each one has its own advantages and you may also want to use both.
Snow foam is the most common and safest option. Snow foam is pH neutral and is designed to cover the entire car with a thick layer of foam. You will no doubt have seen the pictures of cars covered in snow foam on websites and people's social media. It looks cool, and it's effective. You will require a snow foam lance to have the same effect.
You also have the choice of using a pre-wash which can be used on all parts of your car's exterior. Be warned though, some products can affect pre-existing protection such as sealants and wax may be removed and leave your paintwork vulnerable to the elements. Try to opt for a citrus pre wash for a safer pre wash and a TFR if you need to bring the big guns out.
Contact Wash

Ok, time to actually wash the car. As mentioned before, your pre-wash is actually doing most of the job. Washing the car with shampoo will help to remove any last bits of dirt or grime. Always use a dedicated car shampoo — and not Fairy Liquid!
It's important to know that washing your car is also the most dangerous stage for your paintwork. You will be getting hands-on with your wash mitt or wash pad, so the more chance you have of damaging the paint and causing defects.
To help avoid paint defects, follow the "two bucket method"—a popular car washing method and for a good reason—it works! Here’s the theory:
As you wash your car with your wash mitt, it will slowly pick up more and more dirt. The more dirt it picks up, the more likely you are to scratch or damage the paintwork.
So, we get two buckets — one filled with shampoo and warm water and one with just warm water. Now, use the shampoo and water to wash the desired panel of your car and then rinse in the water-only bucket. This will ensure your wash mitt is rid of any dirt before going back in the shampoo and water bucket.
Repeat this process panel by panel for the most effective and safest car wash. You should use specific buckets and grit guards that help to remove dirt from your wash mitt as you rinse and also trap dirt particles at the bottom of the bucket. This ensures they are not transferred back on to the vehicle.
Once you've cleaned the exterior of the vehicle entirely, give the car a good rinse to remove all of the excess shampoo and dirt.
Chemical Decontamination
The entire washing process of your car is to remove contaminants. You will be able to remove most of them using the steps above. However, there are some contaminants that are much harder to remove.
These bonded contaminants stick to your car like glue and most commonly include tree sap, tar, brake dust and iron fallout. To remove these stubborn contaminants, you will need to use special products.
There are few products that can help, including:
- Tar and glue removers — typically a spray used with a microfiber towel (be gentle). You can either spray the entire vehicle, leave for a few minutes and rinse thoroughly or spray the affected areas only and dab with a microfibre cloth to remove.
- Iron fallout removers — like wheel cleaners, just spray, leave for a few minutes and rinse thoroughly.
If there are further contaminants bonded to the paint then you could also use a clay bar to remove them. Clay bars should only be used if absolutely necessary as they can cause marring to the paint work. It is also recommended that you use a dedicated clay bar lubricant to help the clay glide over the surface and to lift contaminants in a safe manner. Use a light and soft clay bar, move slowly and only in straight motions, don't use excessive force and store the clay bar per the manufacturer's guidelines.
It is also worth noting that you may need to polish the vehicle after using a clay bar so only use one when absolutely necessary.
You should then thoroughly rinse the car before moving on to the drying stage.
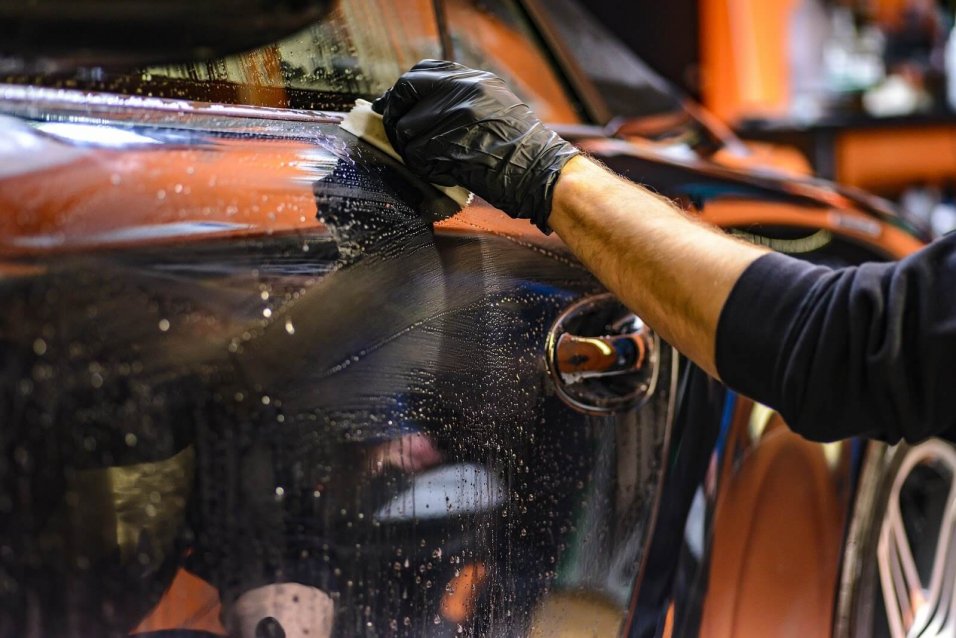
Drying
There are two main ways to dry your car, including:
- Blowing (car dryer machine or leaf blower).
- Microfiber drying towels (thick and heavy or twisted pile).
A car dryer is the safest option as there is no need to touch the vehicle but they come at a hefty price. However, it will dry your car like a pro, leaving it spotless and ready to go. You can use a leaf blower but be aware that it could launch small particles at your paintwork if you’ve been using it for leaf blowing around the garden.
Car drying towels are the most popular method, and both types listed above work well. What's more important is that you use the towels in the right way. The trick to drying your car without damaging the paintwork is to dab, not swipe. This takes extra time but will help you avoid scratches.
Final Protection

After all your hard work, all you have to do now is prepare your car with some final protective products. These products will protect all of the hard work carried out in the previous stages.
Using a Sealant
The sealant protects the paintwork you’ve just worked so hard to clean and will help fight against bugs, bird droppings, road salts and all the other common elements.
Gently spread the sealant over the vehicle one panel at a time working in criss cross motions (top to bottom, side to side ) making sure that each panel is covered from edge to edge with a thin layer. Allow the thin layer to cure and buff off with a clean plush microfibre cloth. A sealant will typically create a deeper or high gloss finish once it has been applied.
Some sealants are formulated to be used as a spray and rinse product. Simply spray the sealant on to a wet vehicle and jet wash off for super fast and easy protection.
In the long run, a sealant will help to protect your paintwork for longer, increase the resale value, and make your car easier to wash and dry.
Adding Wax
Finally, to give your car a serious shine, you can use wax. A high-quality car wax is designed to give your car that extra wow factor and the ultimate protection whilst making it shine.
The wax will provide your car’s paintwork with a protective coating that will keep it from fading and acts as a defence against minor scratches. Protection typically lasts for two to six months before you need to reapply.
To apply the wax, you will need an applicator. Here are some quick tips to help you wax like a pro:
- Never use the same cloth for washing and waxing, always use a specific applicator
- Make sure you use a protective sealant (in the step above) before applying wax.
- Don’t wax in the sun.
- Never over-apply wax; follow the manufacturer’s instructions carefully.
- If you fail to remove any spots of dirt or grease during the washing process, the wax will seal it into the paintwork. Check the car before you start.
- Wax your car every two to six months for the best results.
- Don’t wax during the snow season; apply before or after.
Interior Clean

Now your car should be looking like it just left the showroom. Before you drive off, you will need to take care of the interior.
There’s not much point in putting in all the effort to wash the exterior if you then leave the interior in a mess. It’s time to get in the car for some intricate cleaning.
It’s easy to get overwhelmed with the interior as cars have so many small nooks and crannies that are difficult to reach. But, follow the steps below and it shouldn’t be too tricky:
- You will need a vacuum cleaner, microfiber cloth, and a interior detailing brush kit.
- Take out all your mats, car and baby seats and clean them outside of the vehicle. Give the mats a good whack to release all the dust and dirt and vacuum as necessary.
- Remove any trash or loose objects and vacuum everything inside. Make sure to move the seats back and forth so you can reach all the areas of the floor and sides.
- Using your detailing brushes, thoroughly clean the cracks in the seats, seat belt buckles, and all the crevices in the dashboard and centre console. Be meticulous.
- Clean your seats with fabric cleaner or leather cleaner.
- If cleaning leather, avoid rubbing too hard with your detailing brush as leather can be very delicate.
- Dry your leather seats off with a microfiber towel.
- If drying fabric, open all the windows and park in the sun if possible. Alternatively, use a vacuum cleaner that has a special filter designed for use on wet surfaces.
Detailing the Interior
Using an interior detailer, follow the below steps to clean the interior surfaces of your car.
- Shake the bottle well before you open the nozzle.
- Spray the product sparingly onto a soft microfiber cloth and wipe over the surfaces.
- Don’t spray directly onto surfaces to avoid overspray inside the car.
- Buff off the surface using a separate clean plush microfibre cloth.
Repeat the above steps for all your interior surfaces. Don’t forget the dashboard and those hard to reach areas in the corners of the windscreen. Make sure to also clean the side door compartments.
Clean the windows
Use a specific window and glass cleaner, avoid simply using car shampoo or cleaner to wash your windows, neither are up to the job.
Remember, you need to clean the inside and outside of your windows.
The inside windows will likely have film build-up caused by interior chemicals that are leached from the car’s vinyl, rubber, plastics, and leather (if you have it).
The outside windows will have water spots, dirt, and fall-out. Your exterior windows take a beating day in day out from the elements, so they are typically much dirtier than the interior windows.
Cleaning your windows should always be the last part of your car cleaning. Why? Because you will just dirty them during the above steps and will double your work.
Here are the steps for cleaning your windows like a pro:
- Park your car in the shade, so the windows are cool before you start.
- You’ll need a glass cloth, microfiber cloth, and a glass cleaner.
- Start with the windscreen and rear screen as they are the toughest to clean.
- Spray your glass and window cleaner on the window and use the glass cloth in a multidirectional action. Don’t wipe in circles.
- When cleaning the inside of the windows, be sure to spray the window cleaner into your microfiber cloth and then apply. Otherwise, you risk spraying other parts of the interior with window cleaner.
- Avoid using paper towels, a microfiber cloth is the best option to finish a window off.
- When washing the side windows, roll them down, so you don’t miss the very top of the window.
- Consider using a glass sealant which will help water to run off the windows in beads.
- Finally, clean your wiper blades! Otherwise, they will ruin all your good work as soon as you flip them on.
By now, your car should look like it just left the showroom. Before you go take a shower and a well-deserved rest, don’t forget the cherry on the top. Keep your car smelling brand new and fresh by adding an air freshener. Job done.
Final Thoughts
Learning professional car care skills will serve you well through life. It will help you to keep your cars looking stunning and protected from the elements. Cars are a valuable asset that should be taken care of to ensure they stay operating properly while avoiding unnecessary degradation.
Take pride in your car and keep it in top shape. You will fight off the gloomy cloud of depreciation and boost the resale value while you're at it.
To find everything you need to care for your car like a professional, including snow foam, brushes, pre-wash, shampoo, buckets, polish and innovative car cleaning tech, visit our online store.
Our Branches
York Tel: 01904 628828
Malton Tel: 01653 602700
Selby Tel: 01757 403300
Scarborough Tel: 01723 413104
Poppleton Tel: 01904 917280
Harrogate Tel: 01423 223940
Thirsk Tel: 01845 421421


© Copyright 2019 York Motor Factors ~ Head Office: 62 Layerthorpe, York. YO31 7YW ~ Reg number 0955941 Vat reg number 170164586